

From time to time, it’s a good idea to send someone an email. And sometimes it is necessary to have the sending of emails automated.
If you have data processing jobs at Azure Data Factory, then you might want to be able to send an email about how their processing turned out.
It is logical that if you already use the ADF, you would expect the ADF to handle emails as well. But wow. The ADF cannot do this on its own. We’ll have to help it.
I won’t delay it. Logicc Apps can send emails quite easily. In addition, they can be run with a simple http request. And the ADF can create and send http requests. So sending the email itself will not be a problem. The problem will be to create a nice email :-).
Creating Logic App for email sending
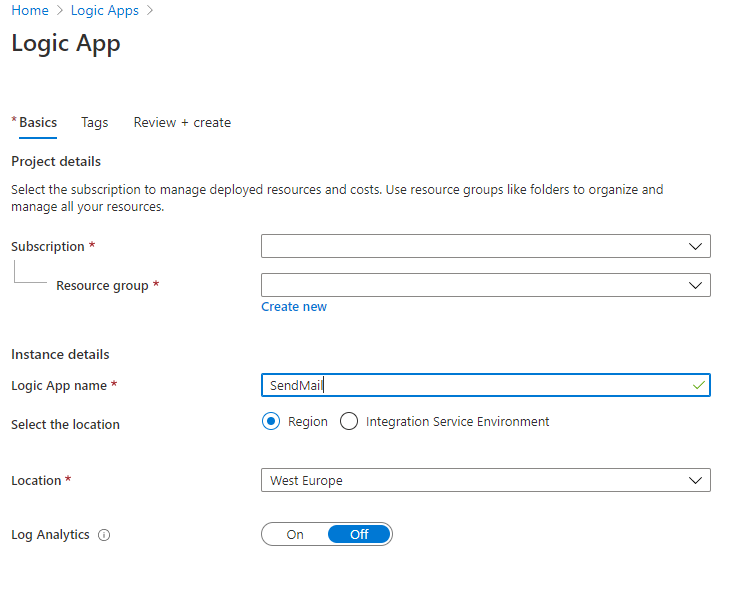
1. Create new logic app. Choose your subscription, resource group and pick name of your app.
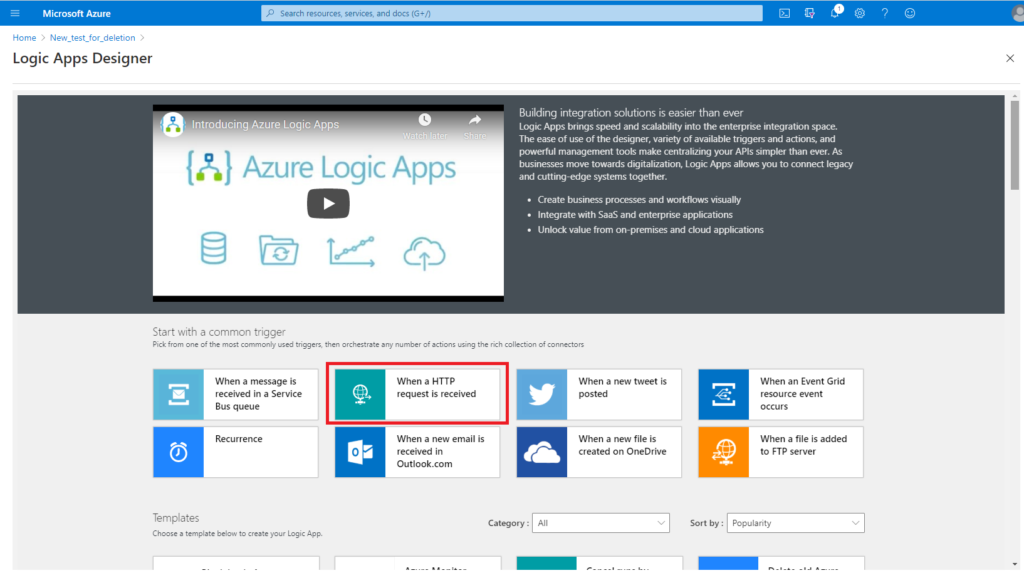
2. In “welcome” screen choose first step “When a HTTP request is received”.
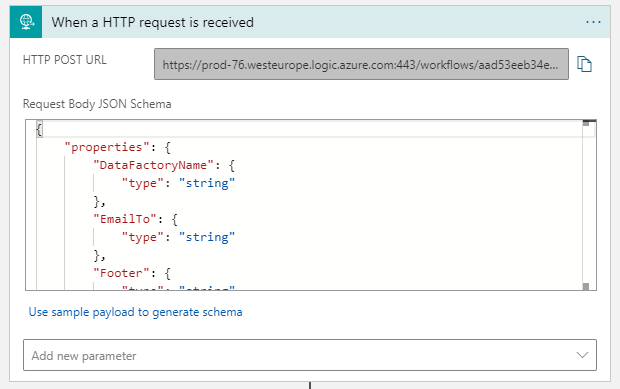
3. Now you need some idea of your email structure.
You can’t do without the fields: EmailTo (email recipient), Subject, Message (the body of the email itself).
Other attributes are up to you. I put the body of the email into the Message attribute already in HTML format. I don’t want to compose an html form of email here in the Logic App. Alternatively, you can send emails as plain text.
Definition of attributes which can HTTP activity process is in JSON format.
{
"properties": {
"DataFactoryName": {
"type": "string"
},
"EmailTo": {
"type": "string"
},
"Footer": {
"type": "string"
},
"Header": {
"type": "string"
},
"Message": {
"type": "string"
},
"PipelineName": {
"type": "string"
},
"Subject": {
"type": "string"
}
},
"type": "object"
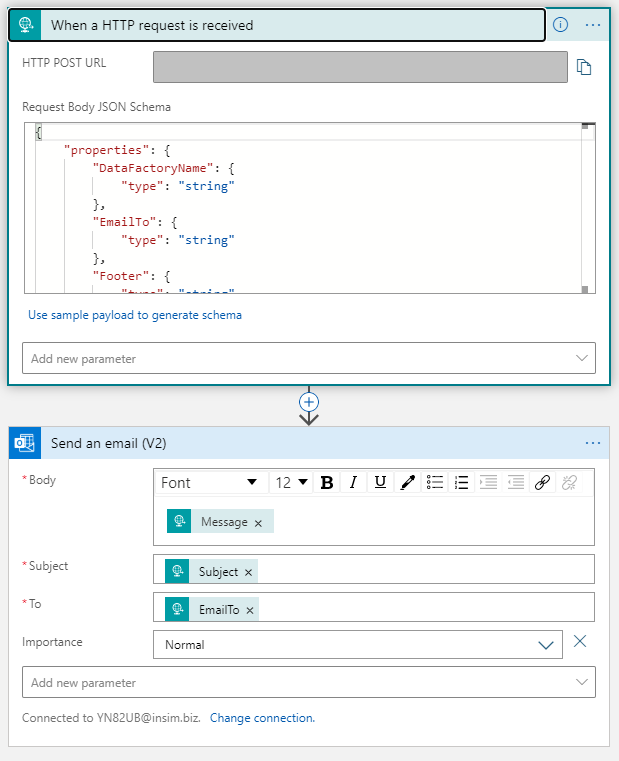
}4. Paste JSON to Request Body JSON Schema field.
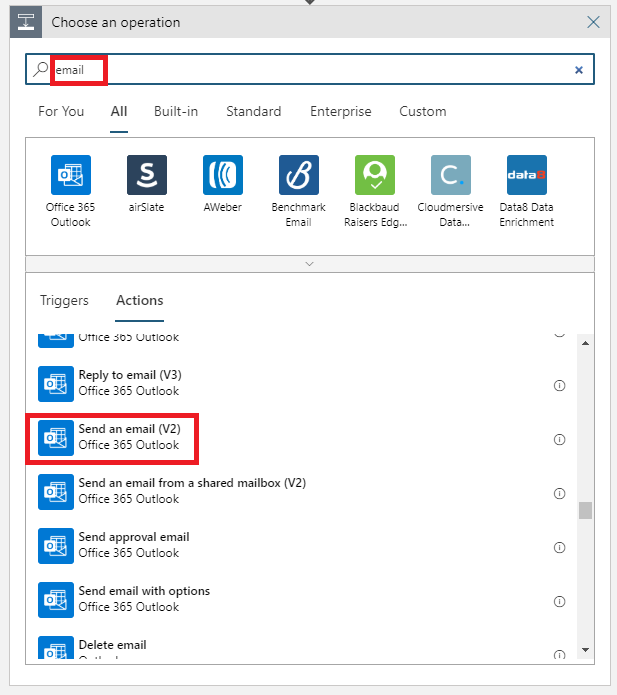
5. Add next step – Send an email. You can choose Office 365 Outlook for that or SMTP server to send your emails.
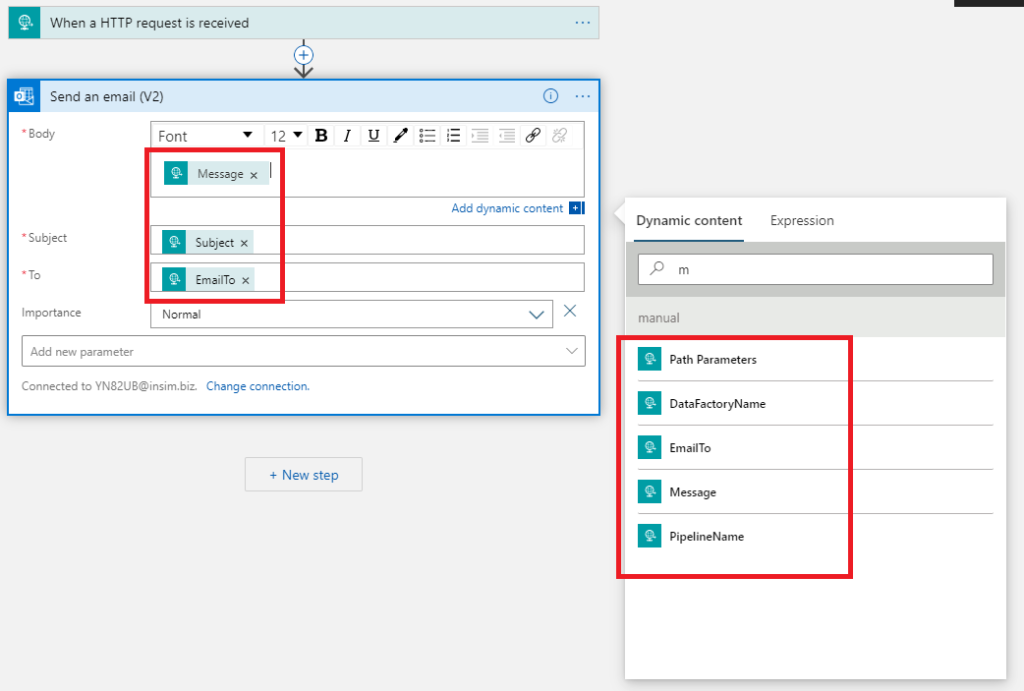
6. Now you use dynamic content to add attributes from HTML request to Send an email (V2) task.
7. If you want to use SMTP server for sending your emails you will need additional information about server (host, login, password). You can call HTTP request with this info in JSON or you can store it directly in Logic App (in particular step).

8. After initial setup logic app should look like this. And you are ready to run. You can use this app from any service which can produce HTTP request (which si send to HTTP POST URL of this app).
Calling Logic App from Azure Data Factory
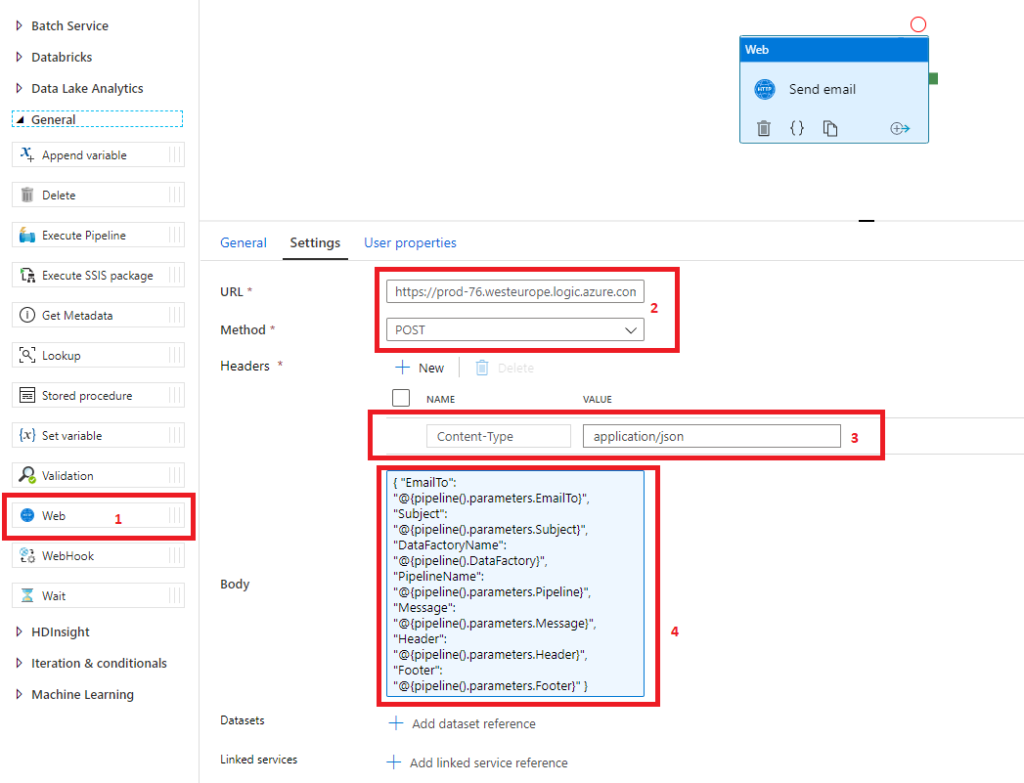
Now you need to setup Azure Data Factory. This is easier than the previous step. Just open any pipeline and add Web activity (1).
Fill URL (2) of Logic App and choose right method (we are using POST). Don’t forget Content-Type (3). The Body (4) section includes all the attributes that the Logic App needs to send an email. Of course in JSON format.
And it’s done. Now you need just test it.
Fill parameters in ADF and run your pipeline.
It’s a simple solution and can be improved and enhanced, but for a basic idea of how to send an email from the ADF, it’s definitely enough.
